How to open project easily
[Video guide]
You need to prepare historical data before testing.
The “New Project” button allows you to select symbols you want to test, test time period, initial deposit in USD, etc.
We recommend creating separate projects to test different trading strategies or specific combinations of trading strategies. This way, it will be easier for you to understand which strategies (or combinations of strategies) work and which don’t.
Please note: you can use real historical tick data during testing (available for subscribers of Super data service).
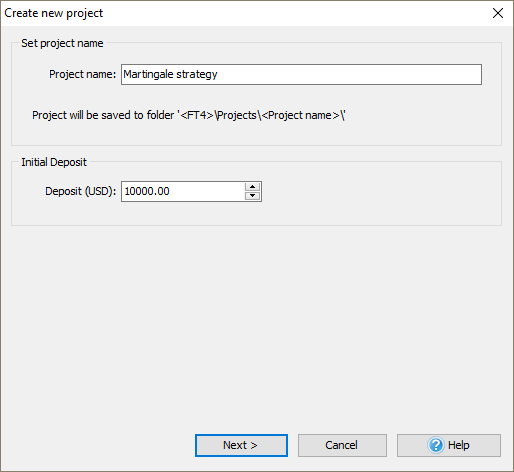
Click the “New Project” button on the Home tab to start a new project.

Set the project’s name and an initial deposit in USD in the appeared window and click “Next” to continue.
Activate the pairs you want to test from the list in the window that appeared.
*You can select all of them using the “Select All” button and test more than one currency symbol simultaneously. However, we do not recommend selecting all currency pairs because it slows down the testing. Select only those currency pairs that are really necessary.
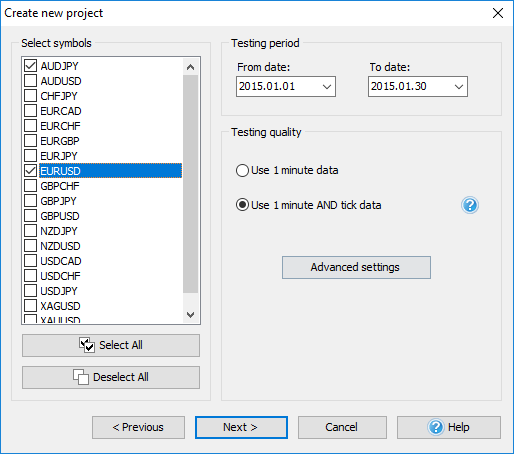
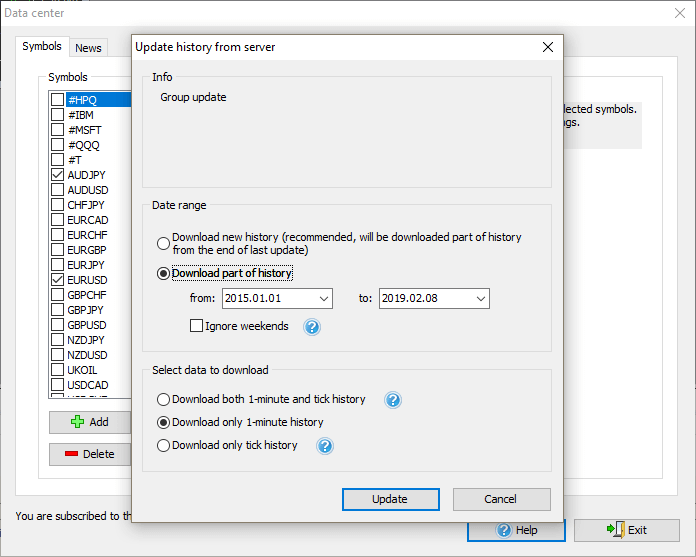
Specify the start and end dates of the period that will be shown during testing in the “From date” and “To date” fields.
A Testing quality block is responsible for the data quality used by our program during testing.
Select either “Use minute data” or “Use minute and tick data” depending on what historical data you have (tick data history is available in Super data service).
The “Advanced settings” button invokes the corresponding window for the settings adjustment.
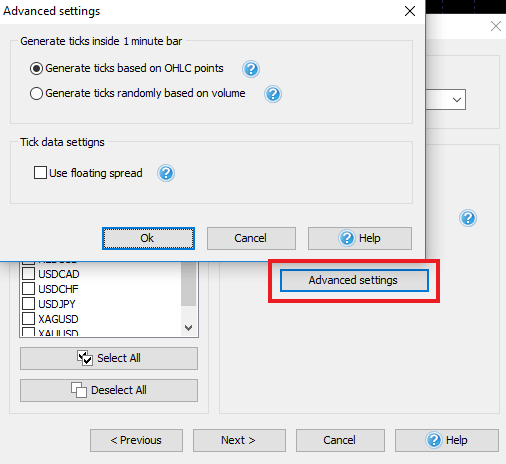
Two methods of ticks’ generation are available in Forex Tester:
- Generate ticks by OHLC points. Each bar will contain 1-4 ticks based on the given bar’s Open/High/Low/Close values (less than 4 ticks are possible if Open=High, or Low=Close).
- Generate ticks randomly by volume. The number of ticks inside a 1-minute bar will be equal to this bar’s volume. Ticks will be distributed randomly inside a single bar.
*We recommend using the first method of ticks generation, as it is the fastest and gives a good testing quality.
If you have selected to Use minute and tick data, the “Use floating spread” option will be available in this window. This feature is vital for all intraday traders (timeframes M1, M5, M15, M30, H1) to obtain the most precise test results.
Click the “Next” button after selecting all the necessary parameters.
Suppose you created a project for several currency pairs, and one of them lacks data. In this case, you will see the following window:
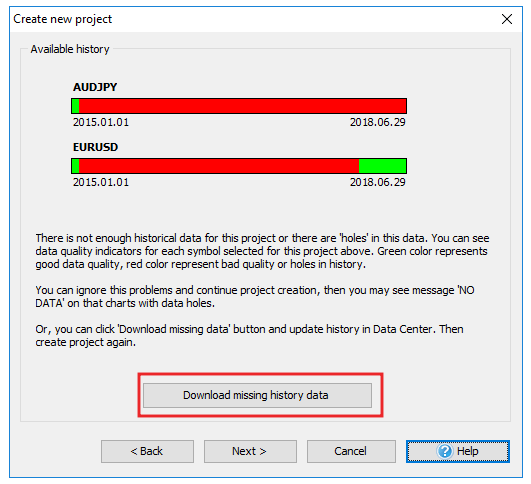
If there is a period you do not have the matching data in the project, it will be marked in red. Download missing history data for these currency pairs and recreate the project.
If you want to skip this step, click the “Next” button.
*Bear in mind that there will be a “No data” message on the symbol’s chart with missed data after the test begins.
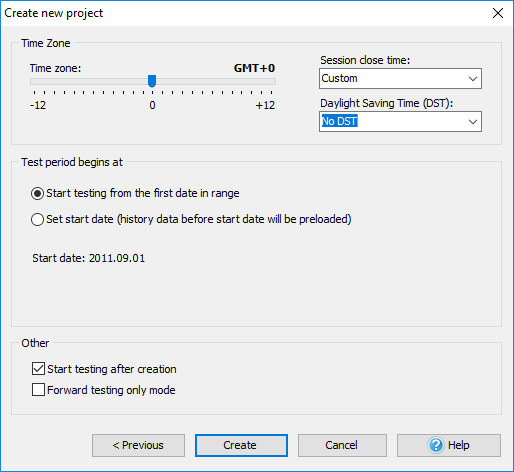
Select the time zone of historical data by using the “Timezone” slider. The selected time zone will be applied to all selected pairs for testing. The default time zone is GMT+0.
The “Session close time” dropdown menu determines the displaying of bars according to the closing time of the session that you need.
The program has 4 predefined Session closing times (Sydney, Tokyo, London, and New York) and a custom time. If you select one of the dropdown menu items, the Time Zone slider automatically moves to the corresponding GMT.
By default, data without applying Daylight Saving Time is used when creating a new project. If necessary, apply DST that matches your region from the dropdown list.
“Start testing from the first date in range” option uses the date from the “From date” field of the previous window.
To change the starting date, use the “Set start day” option. Thus, the testing will be started from a further date, and all previous data will be shown on the chart.
This option will be useful if you want to build lines/indicators based on previous bars immediately or analyze previous data and start trading based on them.
You can either choose the “Start testing after creation” option to start the testing immediately after the project is created or use the “Forward testing only mode” option to make it as close as possible to real conditions.
The last means that you cannot go backward in your testing. You can only restart the project.
After the configuration is complete, click the “Create” button to finish data preparation. The test will start automatically.
If the testing hasn’t started after creation, click the “Start” button on the Home tab to start it manually.